 We'll be creating a
transparent layer from scratch. Follow these steps closely and
you'll be working with SnowScape in no-time.
We'll be creating a
transparent layer from scratch. Follow these steps closely and
you'll be working with SnowScape in no-time.This plugin has puzzled many people. The problem is that it requires a semi-transparent layer in order to work and a lot of people don't know what that means of how to make such a layer. This short tutorial goes through the steps one-by-one for PhotoShop users. The procedure will be similar for other graphics applications.
 We'll be creating a
transparent layer from scratch. Follow these steps closely and
you'll be working with SnowScape in no-time.
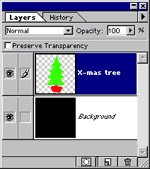
First create a new image of any random size and paint it black or any other color which nicely contrasts with the snow color.
Next create a new layer (the red arrow shows you how) and use PhotoShop's' drawing tools to draw something on the new layer. In our example we drew a simple Christmas tree but you can use any random lines you wish.
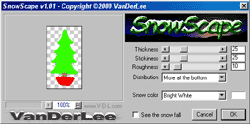
Now start the SnowScape plugin, the window shown on the left should now be displayed on the screen.
 On the
left you see a small preview window with controls to zoom in and
out of it, you can move the part of the image that is being preview
by clicking and dragging in the preview.
The right side contains the controls, from top to bottom these
are;
Thickness - The amount of snow that is falling down.
Stickiness - How slippery the snow is, use a low setting for higher
realism.
Roughness - Applies a random color pattern to the snow.
Distribution - Allows you to specify where you want most snow to
appear by selecting a preset from the list.
Snow color - You can specify any of the preset colors here or mix
your own by clicking on the color box on the right of the list.
See the snow fall - Just a bonus setting to watch the layers of
snow build up, this options does not change the rendering in any
way.
 After
pressing the OK button your settings will be rendered to your own
image and it will look something like this.